Integrate MailerLite with Zencal
Why MailerLite
There are three key advantages that make MailerLite stand out:
- Amazing user experience - The interface is intuitive and saves you time
- Reliable uptime - Your emails get delivered when they should
- Transparent pricing - Great value for the features you get
These factors make MailerLite an excellent choice for businesses of all sizes.
Start your 14-day free trial and automate your scheduling today.
Application of MailerLite
MailerLite can be used in many ways:
- Create beautiful landing pages
- Collect newsletter signups via embedded forms
- Gather attendee email lists from your meetings
The platform enables organizing contacts into pre-designed groups by topic, allowing targeted outreach for future events. This is incredibly powerful when combined with Zencal's meeting data.
Start your 14-day free trial and automate your scheduling today.
Step 1: Preparation
Before we start, you'll need to prepare a few things:
- Obtain an API key from your MailerLite dashboard
- Create a new automation scenario in Make.com
- Select "Custom Webhook" as the first step in your scenario
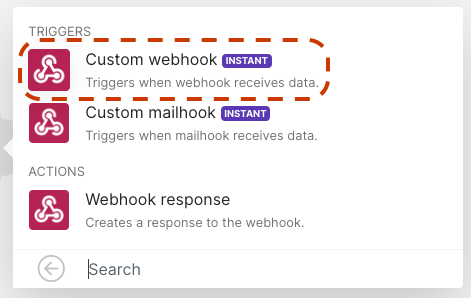
Select "Custom Webhook" as the trigger for your automation:
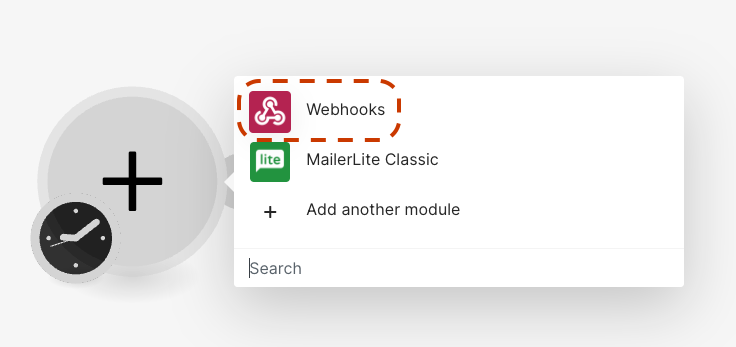
Make sure you have admin access to both your MailerLite and Zencal accounts before proceeding.
Start your 14-day free trial and automate your scheduling today.
Step 2: Webhook Configuration
Now let's configure the webhook:
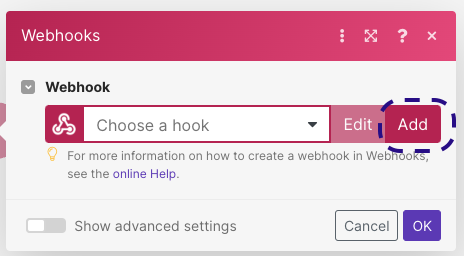
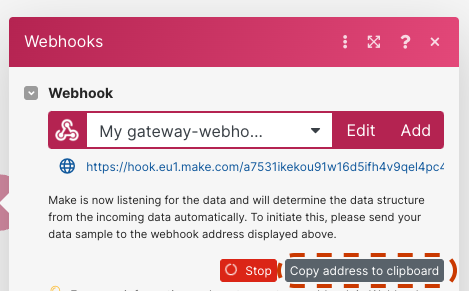
- Create a new webhook in Make.com and copy its address
- Go to your Zencal panel and navigate to Integrations → Webhooks
- Paste the webhook URL you copied from Make.com
- Save your changes
Create the webhook and copy its URL:
Go to Zencal Integrations panel:
Paste the webhook URL:
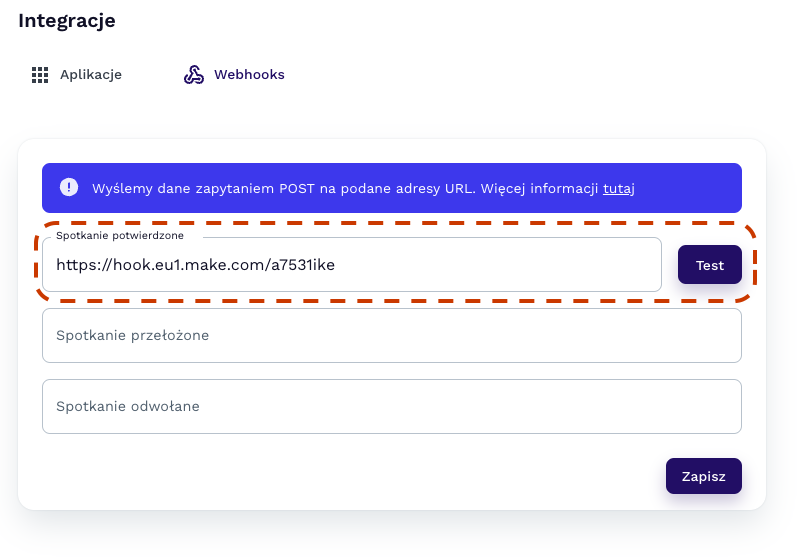
The webhook will allow Zencal to send meeting data to Make.com whenever a new meeting is confirmed.
Start your 14-day free trial and automate your scheduling today.
Step 3: MailerLite Connection
Next, we'll connect MailerLite to the workflow:
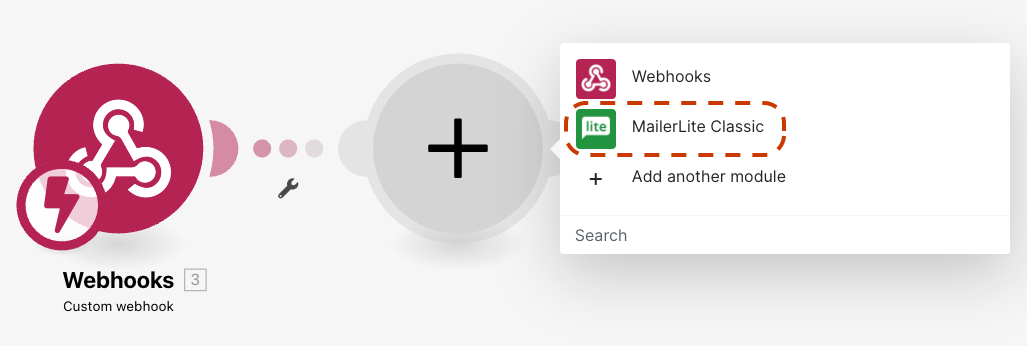
- Add a MailerLite step to your automation in Make.com
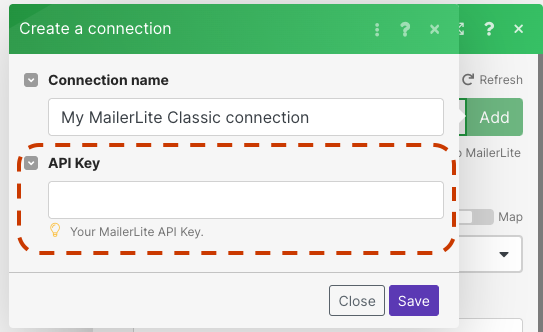
- If no connection exists, paste your API key to create one
- Select "Add subscriber to a group" as the operation
- Choose the target group where you want meeting participants to be added
Add MailerLite module to your scenario:
Enter your MailerLite API key:
Select the group where subscribers should be added:

This step tells Make.com what to do with the data it receives from Zencal.
Start your 14-day free trial and automate your scheduling today.
Step 4: Testing & Activation
Finally, let's test and activate the integration:
- Enable your automation scenario in Make.com
- Go back to Zencal and use the "Test" button to send sample data
- In Make.com, map the participant email field to the MailerLite subscriber email
- Run a test to verify everything works correctly
Enable the automation scenario:
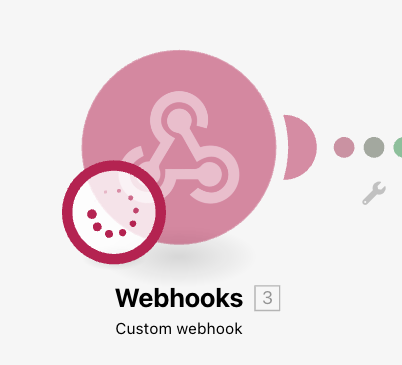
Test the webhook to receive sample data:
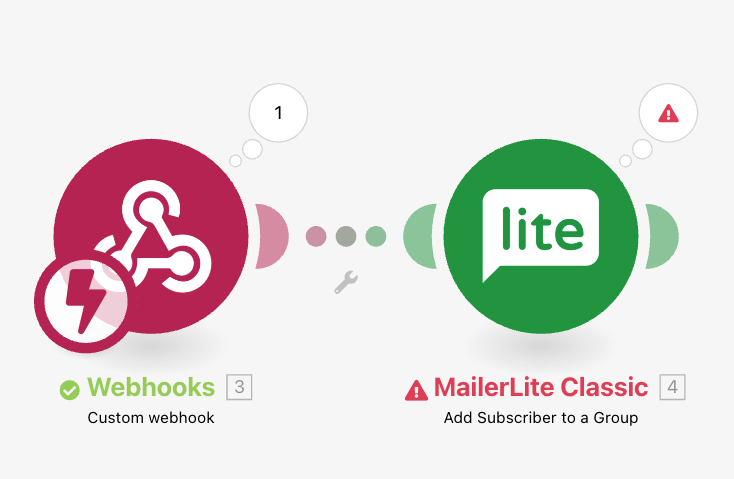
Map the email field from Zencal to MailerLite:

Once tested, your automation is ready! Every time someone confirms a meeting with you, they'll automatically be added to your MailerLite group.
Start your 14-day free trial and automate your scheduling today.
Future Plans
We're working on a native MailerLite integration for Zencal. Once released, you won't need Make.com as an intermediary—you'll be able to connect directly from your Zencal dashboard.
Stay tuned for updates! In the meantime, the Make.com integration works great and gives you full flexibility to customize your automation workflow.
Sign up for a free Zencal account to get started with this integration today.